
Home Improvement
Tile Installation Tips for Bathrooms and Kitchens
Tile is one of the most popular choices for bathrooms and kitchens due to its durability, water resistance, and aesthetic appeal. Whether you’re renovating your Miami home or upgrading a rental property, proper tile installation is essential to ensure long-lasting results. Incorrect installation can lead to cracked tiles, water damage, or uneven surfaces. Here are some essential tile installation tips for bathrooms and kitchens that can help homeowners, DIY enthusiasts, and contractors achieve professional-quality results.
1. Choose the Right Tile for the Space
The first step in any tile installation project is selecting the right type of tile, and consulting an expert tile installer can make a big difference. Not all tiles are suitable for both bathrooms and kitchens. For kitchens, ceramic, porcelain, or natural stone tiles are popular choices because they can withstand heat, spills, and heavy foot traffic. In bathrooms, porcelain and ceramic tiles are ideal for wet areas such as showers and around bathtubs, ensuring durability and water resistance.
Consider the following when choosing tiles:
- Slip Resistance: For bathrooms, look for tiles with a textured or matte finish to prevent slipping.
- Size and Pattern: Larger tiles can make a small bathroom feel more spacious, while smaller tiles are easier to work with on uneven surfaces or for detailed patterns.
- Color and Design: Light-colored tiles can make kitchens and bathrooms feel brighter, while darker tiles hide stains better.
2. Prepare the Surface Properly
Proper surface preparation is critical for tile longevity. Both bathroom and kitchen surfaces must be clean, dry, and level before starting.
- Remove Old Flooring: If you are replacing existing tiles, remove them carefully to avoid damaging the subfloor.
- Check for Moisture: Bathrooms are high-moisture areas, so ensure there is no water damage or mold before tiling. Use a moisture-resistant backer board for wet areas.
- Level the Surface: Uneven surfaces can lead to cracked tiles and uneven grout lines. Use a leveling compound if necessary.
3. Plan Your Layout
Planning the layout before applying adhesive saves time and ensures a professional look.
- Dry Fit Tiles: Lay out tiles without adhesive to see how they will fit. Adjust for cuts or patterns.
- Center Your Design: Start from the center of the room and work outward to ensure symmetry, especially for visible areas like bathroom floors or kitchen backsplashes.
- Consider Expansion Gaps: Leave small gaps along walls for expansion and contraction, which helps prevent tiles from cracking over time.
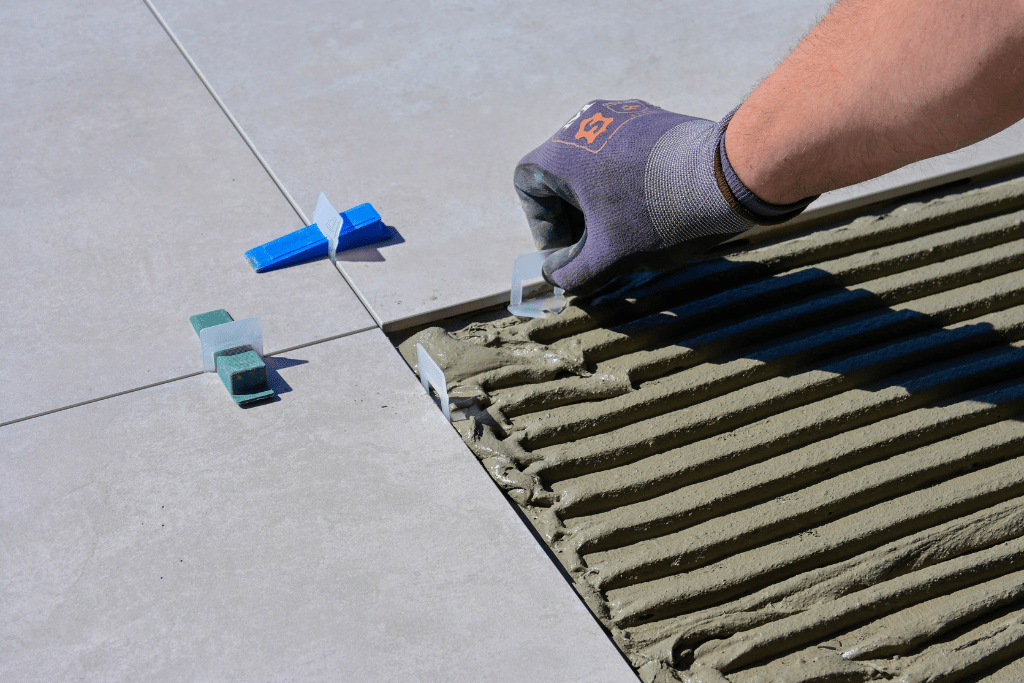
4. Use the Right Adhesive
Choosing the right adhesive is crucial for durability.
- Thin-Set Mortar: Commonly used for ceramic and porcelain tiles in both bathrooms and kitchens. It provides a strong, flexible bond.
- Mastic Adhesive: Suitable for small tiles and wall applications in dry areas, such as kitchen backsplashes.
- Waterproof Adhesive: Essential for wet areas like showers and around sinks to prevent water infiltration.
Always follow the manufacturer’s instructions for mixing and applying adhesive.
5. Cutting Tiles Accurately
Tile cutting is often the trickiest part of installation. Proper cuts ensure clean edges and a professional finish.
- Use a Wet Saw: A wet saw is ideal for precise cuts on ceramic, porcelain, and natural stone tiles.
- Tile Nippers: Useful for small adjustments or irregular shapes around fixtures.
- Measure Twice, Cut Once: Accurate measurements prevent wasted tiles and uneven layouts.
6. Apply Grout Correctly
Grouting fills the gaps between tiles and provides stability while preventing water infiltration.
- Choose the Right Grout: Sanded grout is suitable for wider gaps (more than 1/8 inch), while unsanded grout works best for narrow gaps.
- Seal Grout: Especially in bathrooms and kitchens, sealing grout prevents stains and water damage. Reapply sealant every year or as recommended.
- Clean Excess Grout: Wipe off excess grout before it dries to avoid residue on the tile surface.
7. Allow Proper Curing Time
Patience is essential after installation. Tiles and grout need time to cure before exposure to water or heavy traffic.
- Follow Manufacturer Recommendations: Adhesive and grout curing times vary; typically, allow 24–48 hours before light use and up to 7 days for full water exposure.
- Avoid Heavy Loads: Do not place heavy appliances or furniture on newly installed tiles until fully cured.
8. Maintenance Tips
Proper maintenance extends the life of your tiles and keeps bathrooms and kitchens looking new.
- Regular Cleaning: Use mild cleaners to prevent buildup of soap scum or grease.
- Avoid Abrasive Tools: Use soft brushes or cloths to avoid scratching tile surfaces.
- Inspect Grout: Regularly check grout for cracks or discoloration and repair as needed.
Read the article: Your Roof vs. The Weather: Who’s Winning the Fight?
Conclusion
Installing tiles in bathrooms and kitchens can dramatically enhance the beauty and functionality of your space, but proper planning and execution are crucial. Choosing the right tiles, preparing surfaces, using appropriate adhesives, and following precise installation steps all contribute to long-lasting results. Whether you hire a professional or take on a DIY project, these tile installation tips for bathrooms and kitchens can help ensure your tiles look great and stand up to daily use for years to come.
Proper tile installation not only improves aesthetics but also protects your home from water damage and reduces maintenance costs, making it a smart investment for any Miami homeowner.

A Sociological Look at Discord Study Groups and Gen Z Lifestyle

Transforming Your Bedroom into a Personal Sanctuary: A Woman’s Guide to Style and Function in 2026

How The Best Laser For Wrinkles Can Transform Your Skincare Routine

7 Benefits of Hearing Aid in Malaysia for Seniors

Scott Patterson’s First Wife, Vera Davich: Everything You Need to Know

All About Shaherah White: Barry White’s Daughter, Family, and Journey

Understanding Investment Thresholds for Permanent cand Citizenship Pathways

Who Is AJ Lambert? Her Career, Style, and Legacy

Daniella Liben’s Journey: Family, Career, and Life With Adam Pally

6 Ways Dentist In Bensalem, PA Helps Maintain Oral Health

Dixie Brubaker: Life Story of Dinesh D’Souza’s Former Wife

JOP Net Worth 2025: How Rich Is the Fuerza Regida Frontman?

Rouba Saadeh: Life, Career, and Everything About Michele Morrone’s Ex-Wife

All About David Rubulotta – Age, Career, Family, and Life with Erin Burnett

Who is Harry Joseph Letterman? Facts About David Letterman’s Son

Who Is Rebecca Romney? Life, Work, and Personal Story

Who Is Terrence Duckett? Facts About Jasmine Guy’s Ex-Husband

All About Ryan McPartlin: Career, Acting, Family, and More

Cindy Costner Net Worth – Inside the Life of Kevin Costner’s First Love

Who Is Khalyla Kuhn? Life, Family, and Career of Bobby Lee’s Partner
A Sociological Look at Discord Study Groups and Gen Z Lifestyle
Transforming Your Bedroom into a Personal Sanctuary: A Woman’s Guide to Style and Function in 2026
How The Best Laser For Wrinkles Can Transform Your Skincare Routine
7 Benefits of Hearing Aid in Malaysia for Seniors
Scott Patterson’s First Wife, Vera Davich: Everything You Need to Know
All About Shaherah White: Barry White’s Daughter, Family, and Journey
Understanding Investment Thresholds for Permanent cand Citizenship Pathways
Who Is AJ Lambert? Her Career, Style, and Legacy
Daniella Liben’s Journey: Family, Career, and Life With Adam Pally